Preparing for the Photoshoot
Planning ahead ensures your cosplay photos stand out. I focus on key elements like:
- location
- lighting
- costume
readiness to guarantee flawless shots.
Choosing the Right Location
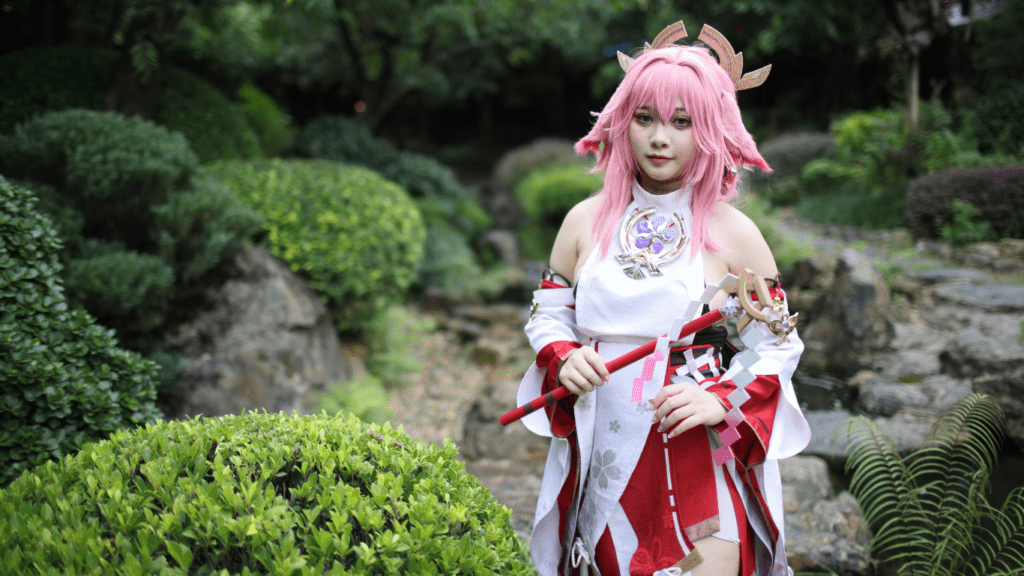
I select locations that enhance the story of the character I’m portraying. For fantasy characters, I opt for woods or medieval-looking buildings; for futuristic looks, urban settings with modern architecture work best. Accessibility and permission are also critical factors when finalizing a location to avoid disruptions during the shoot.
Ensuring Proper Lighting
Natural light often provides the best results, especially during golden hour, which occurs shortly after sunrise or before sunset. I avoid harsh midday sunlight unless I use diffusers for softer effects. For indoor shoots, I prefer softbox lighting setups or ring lights to maintain even illumination and reduce shadows on detailed costumes.
Perfecting Your Cosplay Outfit
I inspect my costume prior to the shoot, repairing any damages and ensuring every accessory is in place. Wrinkled fabrics can distract from the overall look, so I steam or iron them appropriately. I also carry a small sewing kit or adhesive in case of emergencies during the photoshoot.
Camera and Equipment Essentials
Using the right tools makes a significant difference in cosplay photography. Investing in quality equipment elevates the details and highlights the craftsmanship of your creations.
Selecting the Right Camera
- Cameras with manual controls offer the most flexibility.
- DSLRs and mirrorless cameras, like the Canon EOS R50 or Sony a6100, provide excellent image quality with adjustable settings for exposure, focus, and white balance.
- Entry-level options, such as the Nikon D3500, are budget-friendly yet capable of delivering professional results.
- Smartphone cameras with advanced features, like the iPhone 14 Pro or Samsung Galaxy S22 Ultra, can work well if used in optimal lighting conditions.
Understanding Lens Choices
Lenses define your images’ clarity and depth. Prime lenses, such as 50mm or 35mm f/1.8, create a sharp subject focus with smooth background blur, ideal for single-character portraits. Wide-angle lenses, like 24mm, suit group shots or environments where you want to highlight intricate backdrops. For action poses or wide scenes, zoom lenses between 24-70mm offer versatility by avoiding the need to frequently switch lenses during shooting.
Must-Have Accessories
Accessories enhance efficiency and image stability. Tripods help maintain steady shots, especially for low-light or long-exposure setups. Reflectors adjust light without relying entirely on artificial sources, making them key for outdoor shoots. A camera remote prevents unintentional movement during shot-taking. External flashes ensure even lighting when natural light is insufficient, while extra batteries and memory cards keep the shoot uninterrupted.
Techniques for Stunning Cosplay Photography

Capturing impressive cosplay photos involves more than just a click of the shutter. Mastering composition, angles, and depth creates visually striking images.
Framing and Composition
I focus on framing each shot to highlight the essence of the character. Placing the subject using the rule of thirds balances the image and draws attention to key details. Incorporating leading lines, such as staircases or tree branches, directs the viewer’s eye toward the cosplay. Choosing uncluttered backgrounds ensures the costume remains the focal point of the photo.
Using Angles and Perspectives
Exploring unique angles enhances the storytelling element of cosplay photography. I shoot from a low angle to portray power or strength, fitting for heroic characters. Overhead angles work well for vulnerable or contemplative moments. Experimenting with tilted frames, called Dutch angles, adds a dynamic and dramatic feel to certain shots.
Working with Depth of Field
Adjusting depth of field creates a professional finish by isolating the character from the background. I use wide apertures (e.g., f/2.8 or f/1.8) to blur busy surroundings during outdoor shoots. With ensemble scenes or detailed outfits, smaller apertures (e.g., f/8 or f/11) keep all elements sharp. Managing subject distance also helps balance focus and background detail effectively.
Post-Photoshoot Editing Tips
Editing complements the effort put into photographing your cosplay, turning great shots into stunning visuals. By refining colors, textures, and details, you can highlight your craftsmanship and bring characters to life.
Enhancing Colors and Textures
I focus on adjusting brightness, contrast, and saturation to make colors pop without overdoing them. For vivid costumes like superhero outfits, boosting saturation slightly enhances vibrancy. For textured materials, sharpening specific areas emphasizes intricate details without creating noise. Using tools like Adobe Lightroom or Snapseed, I apply subtle highlights and shadows to create depth in fabric folds and accessories.
Removing Imperfections
Even the best photos can have distractions like stray hairs or minor costume flaws. I use spot removal and healing tools in Photoshop or apps like TouchRetouch to clean up these elements. Whether it’s wrinkles in fabric or unwanted blemishes on the skin, I target only what detracts from the overall image to retain authenticity. Cloning tools help replace small inconsistencies with matching textures, ensuring a seamless look.
Adding Special Effects
I enhance the storytelling by incorporating effects that match the character’s theme. For magic-wielding characters, I might use glowing orbs or lightning effects available in software like After Effects or Photoshop. Motion blurs and lens flares add drama to action poses, while overlays, such as sparks or snowfall, bring dynamic energy. Using tools sparingly ensures the focus remains on the cosplay rather than the edits.


